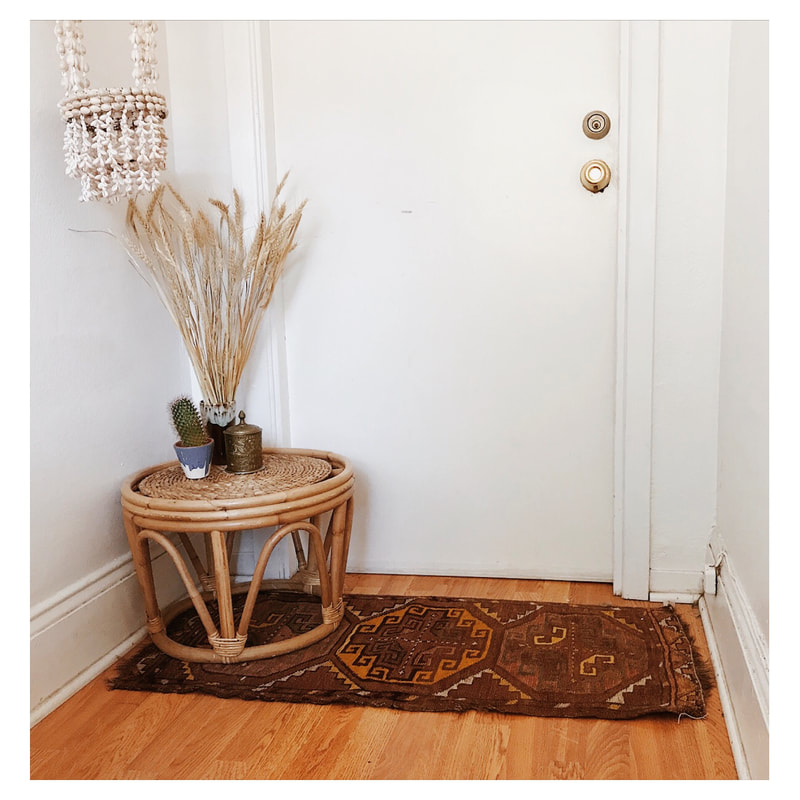
 Unicorn photo studio needed no lighting equipment or tripod, and had beautiful flooring/walls. Unicorn photo studio needed no lighting equipment or tripod, and had beautiful flooring/walls. About 4 months ago, I was taking pictures in a unicorn of an amateur photography studio. It was a 3’x3’ indoor landing for the front door to my second story apartment. It had white walls, a wood floor, a built-in shelf with hooks, and got great natural light for about 5 hours per day. It was a dreamy (but small) space for taking product photos. Then, I had to move suddenly (see my previous blog post for more on that) and found myself without a photography studio. Now, I live in my parents’ house where nearly every room (including my bathroom!) is carpeted, the walls in my room are a dark taupe color, and there are tall redwoods surrounding the house blocking out light most of the day. So, I struggled with figuring out where to take pictures and how to work with the less than ideal set up. I’m definitely not a photography expert, but I have figured out how to make my little, dark, carpeted space work. I have two studios set-up in my bedroom, lighting equipment, a tripod, and props that give my photos a signature look. I have a space dedicated to small product shots and another for shots of me modeling clothing. So, here’s what I’ve learned in the last three months making this space work for me: 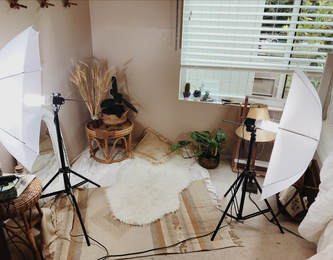 Current studio view with natural light from the window, photography lighting equipment, and lots of props. Current studio view with natural light from the window, photography lighting equipment, and lots of props. Natural light is a l w a y s better, but the sun doesn’t always cooperate. When I first moved into my new space, I was a slave to sunlight and would put off photographing if it was too cloudy. This isn’t good for business, so I decided to invest in some lights. I searched for photography lighting on Amazon and found these. They’ve been great for lighting up pictures of small items. Their light isn’t harsh since it’s bouncing off the umbrellas, they are super light, and easily stored. They’ve been a game-changer for me in my less-than-ideal space during the winter. Create a dedicated space. This is pivotal to developing a brand image, but it’s also important for me to be able to slide into taking pictures as seamlessly as possible. I don’t want to waste time setting up or put off taking photos because I’m lazy. In my last apartment, set up was minimal. All I did was drag the stuff I was photographing into the doorway and throw my rug on the floor — the lighting (a window), walls (white), floor (beautiful hardwood), and hooks (a built-in shelf) were already in place and I wasn’t storing much of anything (besides shoes) on the landing. Now, I use a white sheet, two rugs, two plants, a pillow, stools, lighting equipment, an accordion rack, and a tripod to achieve the look I want in my photos. I generally leave everything set up all the time, so the amount of time it takes for me to get into the photography groove is about the same as it was in my low maintenance space. This means I spend less time setting up and more time getting the shots I need so I can quickly move on to posting new listings. 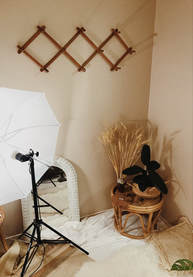 This accordion rack is a fixture in my studio, it replaces the built-in shelf I had in my last apartment. This accordion rack is a fixture in my studio, it replaces the built-in shelf I had in my last apartment. Have fun with props. Props are a great way to explore your aesthetic and create a unique look for your brand. When I had the wood floor and white walls, I went for a minimalist look. Now that I’m trying to overcome the carpet and taupe paint, I’ve found layering colors and textures to be helpful in creating a cool boho-inspired look for my product shots. I try to embody my brand inspiration (earthy + global boho wares) in my product photography. Whatever your style, use your props to communicate it to your customer!
It’s hard to overestimate the importance of good photos when selling online, especially when competing against hundreds of other listings on Etsy or Google. So, invest in equipment and props that will enhance your photos and communicate your brand to potential customers. And finally, don't get discouraged if things don't work out. I'm constantly rethinking my studio space and trying to make it work for the inventory I'm shooting -- it's part of the fun & the work of our job!
0 Comments
Leave a Reply. |

Claire is the owner + curator at Southside Vintage. She lives in Sacramento, CA and spends as much time as possible relaxing with her dog, Dylan.
|
